tesbla - A better Sentry for Tesla
Improvements for your Sentry (Tesla).
A better Sentry and Video Surveillance for Tesla called tesbla (Tesla + BlaBla) that started in March 2022.
What you will get?
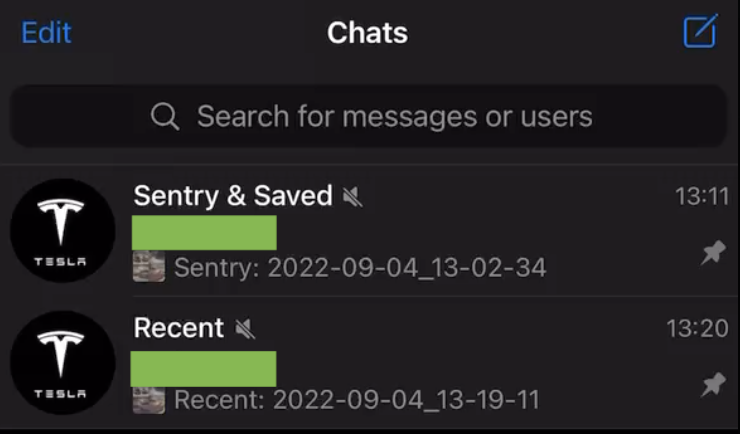
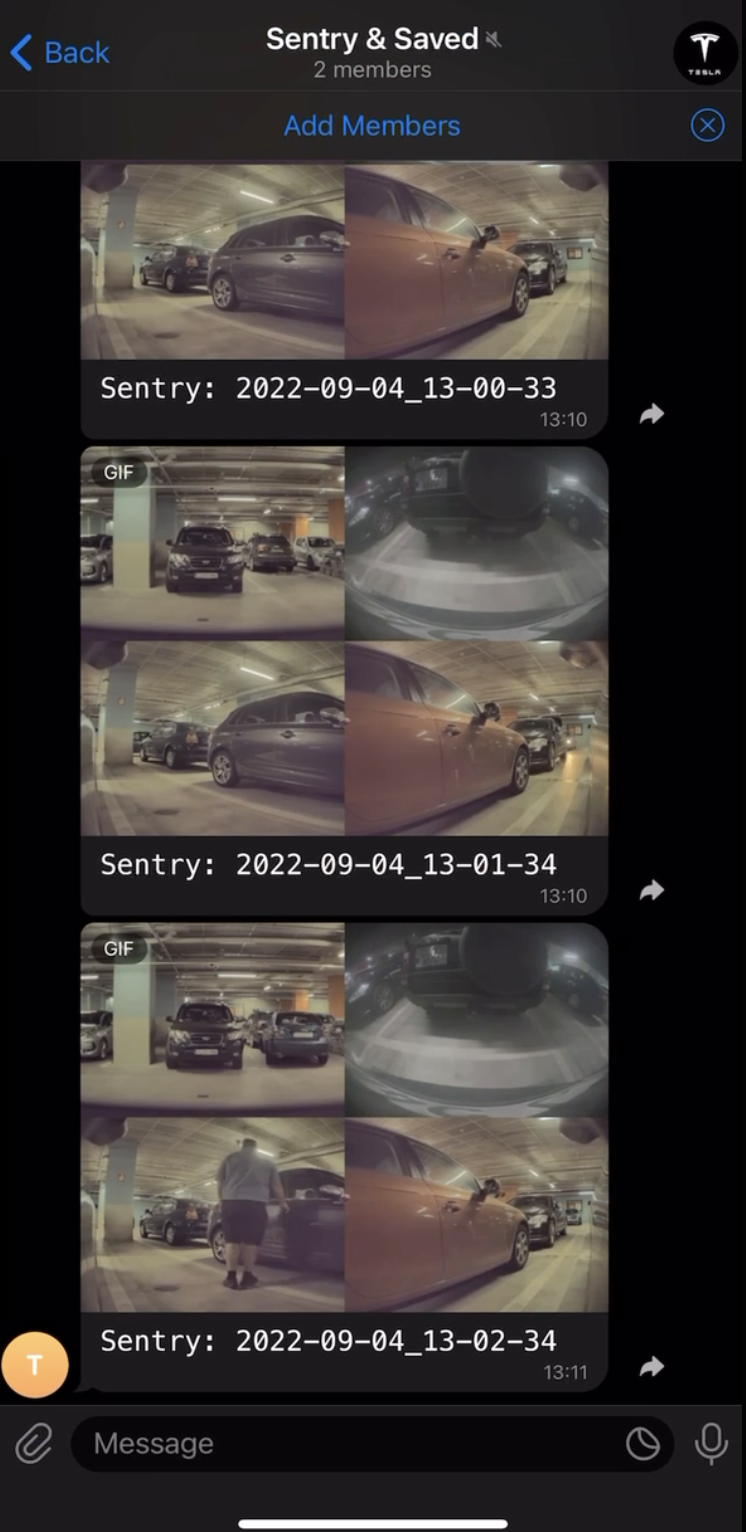
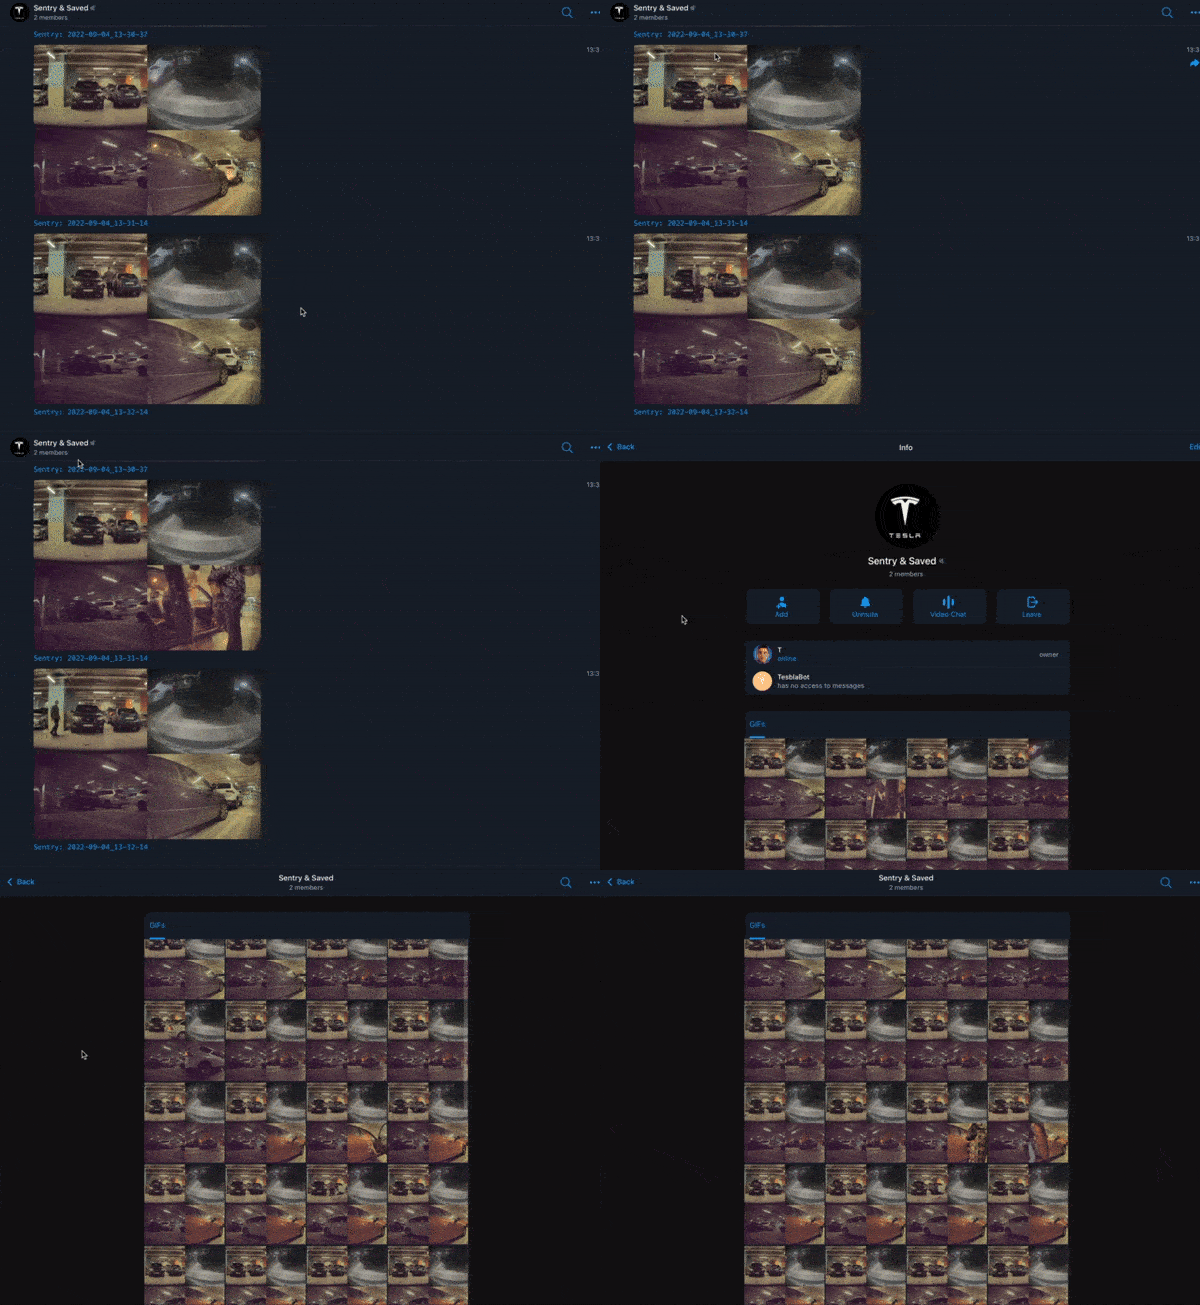
- Notifications on Telegram for Sentry & Saved videos and realtime videos every minute.


Details
- Every minute will be compressed, merged into a single video, fast-forwarded to 4 seconds and send to your Telegram.
- Statistics:
- Bandwidth: Every video (from all 4 Tesla cameras) is having ~25-30 MB, so they have ~100 MB in total. These videos will have ~200-500 KB after tesbla will do the process. Based on these calculations you will use ~500 MB / day | 15 GB / month.
- Power (~2-3 kW/month):
- Consumption of the Raspberry should be ~2-3 kW / month.
- Consumption of the Mobile Phone is ~2-3 kW / year.
- Sentry Tesla: This is the biggest consumer with 5-6 kW / day.
Todo (nice to have)
- Timelapse at every 30 minutes.
- Optimization to use GPU instead of CPU (there are some complex incompatibilities at the moment due to underlay libraries).
- Improved statistics about batter consumptions and bandwidth.
Requirements
- You need to have a bit of technical knowledge or to be comfortable to follow a technical guide.
- Computer.
- Telegram account.
- Download & Install: https://www.raspberrypi.com/software/ (Imager).
- One of the Raspberry Pi 4 / Raspberry Zero W / Raspberry Zero W 2.
- Micro-SD Card 64GB+ and Card Reader for Micro-SD.
- For Storage it is better to have SSD Disk.
- Cable USB 3.1 to USB-C (it can be useful in some conditions).
- Mobile Phone with hotspot support and Internet connectivity, eventually one that you don't need anymore and can be kept in the car.
- In Romania we recommend Yoxo/Orange - 19 lei / month - so around 4.35$, including taxes. They offer support for e-sim as well.
Step 1 - Initial Preparation
- Open Raspberry PI Imager and configure SSH + SSH Keys.
- Write the Raspberry image (OS Lite 64-bit, Debian version: 11 bullseye) to your SD-Card via Imager.
- Disconnect and connect again your SD-Card after the write is complete.
- Put the SD-Card in the Raspberry and connect the device to your computer.
- Wait until your Raspberry is visibile in the defined network from wpa_supplicant (check your router for clients if you don't know the IP). Hostname should be
raspberrypi. - Create a new Telegram Bot: @Botfather -> (/newbot) -> TesblaBot (save the credentials)
- Create a new groups (Sentry & Saved & Recent. you can mute the Live one). Invite the newly created bot + change the group icon.

- Send
/startas message in the newly create channels from your account. - Run on your terminal:
curl https://api.telegram.org/bot<TOKEN>/getUpdates | grep group - Save the channel id (something like -11123232).
Step 2 - OS Preparation
# Connect to Raspberry via SSH (if Android Hotspot, probably 192.168.64/73.85)
ssh -o UserKnownHostsFile=/dev/null pi@192.168.1.191
# Kernel Configs for USB and a module to emulate USB Mass Storage
echo "dtoverlay=dwc2" | sudo tee -a /boot/config.txt
echo "dwc2" | sudo tee -a /etc/modules
echo "g_mass_storage" | sudo tee -a /etc/modules
# Update & Upgrade OS
sudo apt-get update
sudo apt-get -y upgrade
# Install OpenCV so we can get useful details from processing videos (for the future)
sudo apt-get install -y kpartx ffmpeg git python3-pip libhdf5-dev libhdf5-serial-dev
sudo python3 -m pip install opencv-contrib-python
# Install ffmpeg (in case of need to compile)
# git clone --depth 1 --branch release/4.3 https://github.com/FFmpeg/FFmpeg
# https://trac.ffmpeg.org/wiki/CompilationGuide/Ubuntu
# https://trac.ffmpeg.org/wiki/Create%20a%20mosaic%20out%20of%20several%20input%20videos
# https://ffmpeg.org/ffmpeg-filters.html#xstack
# sudo apt-get -y install autoconf automake build-essential cmake git-core libass-dev libfreetype6-dev libgnutls28-dev libmp3lame-dev libtool libvorbis-dev meson ninja-build pkg-config texinfo wget yasm zlib1g-dev
# mkdir -p ~/ffmpeg_sources ~/bin
# ffmpeg -i video.mp4 -c:v h264_v4l2m2m -b:v 8M -c:a copy test.mp4
# ./configure --prefix=`pwd`/install --enable-gpl --enable-nonfree --arch=aarch64 --enable-libx264 --enable-libx265
# make -j $(nproc)
# make install
Step 3 - Application & Service: tesbla.py
sudo nano /usr/bin/tesbla.py
/usr/bin/tesbla.py
# Python 3
import os
import time
from glob import glob

# User Configuration
telegram_channels = {
    'SentryClips': '<TeslaCam_channel_id>', # TeslaCam
    'SavedClips': '<TeslaCam_channel_id>', # TeslaCam
    'RecentClips': '<TeslaLive_channel_id>', # TeslaLive (more spammy, every minute)
}

# App Configuration
app_directory = f'/tesbla'
usb_directory = f'{app_directory}/usb'
usb_image = f'{app_directory}/usb.img'
tesla_cam = f'TeslaCam'

# Initial Setup
os.system(f'sudo mkdir -p {usb_directory}')
os.system(f'sudo mkdir -p {app_directory}/{tesla_cam}')
# USB Disk Image
if not os.path.isfile(usb_image):
    os.system(f'sudo dd if=/dev/zero of={usb_image} bs=1 count=0 seek=80G')
    os.system(f'sudo mkfs.exfat -n "{tesla_cam}" {usb_image}')
    # Create TeslaCam directory - required by Sentry
    os.system(f'sudo kpartx -av {usb_image} && sudo mount -o rw /dev/mapper/loop0p1 {usb_directory} && sudo mkdir -p {usb_directory}/{tesla_cam} && sudo umount {usb_directory}')
os.system(f'sudo mount -o ro /dev/mapper/loop0p1 {usb_directory}')

# Device as USB Mass Storage via the created image
os.system(f'sudo modprobe g_mass_storage file={usb_image} nofua=1 luns=1 ro=0 stall=0 removable=1 cdrom=0 idVendor=0x0781 idProduct=0x556e bcdDevice=0x0103 iManufacturer="SanDisk" iProduct="Cruzer Edge" iSerialNumber="990431108215FFF05368"')

## RecentClips - Random clips likely pulled by Tesla as part of the opt-in data sharing. If Sentry is activated, it's always writting here.
## SavedClips - Tapping the camera icon on the screen will store the last 10 minutes of footage.
## SentryClips - All recorded footage for each time sentry detected significant motion.
dirs = {
    'SentryClips': f'{usb_directory}/{tesla_cam}/SentryClips/*/*-front.mp4',
    'RecentClips': f'{usb_directory}/{tesla_cam}/RecentClips/*-front.mp4',
    'SavedClips': f'{usb_directory}/{tesla_cam}/SavedClips/*-front.mp4'
}

while True:
    time.sleep(1)
    # Re-mount USB so we can see the new files
    os.system(f'sudo kpartx -av {usb_image}')
    os.system(f'sudo mountpoint {usb_directory} >/dev/null 2>&1 && sudo umount {usb_directory}')
    os.system(f'sudo mountpoint {usb_directory} >/dev/null 2>&1 || sudo mount -o ro /dev/mapper/loop0p1 {usb_directory}')

    # Monitor for new files and process them
    for key, value in dirs.items():
        os.system(f'sudo mkdir -p {app_directory}/{tesla_cam}/{key}')
        # Monitor every directory
        for filename_full in glob(value):
            directory_full = filename_full[:-30] # ./SentryClips/2022-02-22_07-10-52/2022-02-22_07-09-54-front.mp4
            directory = directory_full.split('/')[-2] + '/'
            # Get only filename and keep only the datetime
            filename = os.path.basename(filename_full)[:-10] # 2022-02-19_20-14-51-front.mp4
            # Skip if already processed
            if not os.path.isfile(f'{app_directory}/{tesla_cam}/{key}/{filename}.mp4'):
                os.system(f'sudo ffmpeg -y -hide_banner -stats -i {directory_full}/{filename}-front.mp4 -i {directory_full}/{filename}-left_repeater.mp4 -i {directory_full}/{filename}-back.mp4 -i {directory_full}/{filename}-right_repeater.mp4 -filter_complex "[0]setpts=PTS/15,fps=30,scale=320:240[v0];[1]setpts=PTS/15,fps=30,scale=320:240[v1];[2]setpts=PTS/15,fps=30,scale=320:240[v2];[3]setpts=PTS/15,fps=30,scale=320:240[v3];[v0][v1][v2][v3]xstack=inputs=4:layout=0_0|0_h0|w0_0|w0_h0[v]" -map "[v]" {app_directory}/{tesla_cam}/{key}/{filename}_tmp.mp4 && mv {app_directory}/{tesla_cam}/{key}/{filename}_tmp.mp4 {app_directory}/{tesla_cam}/{key}/{filename}.mp4')

            # Skip if already notified
            if os.path.isfile(f'{app_directory}/{tesla_cam}/{key}/{filename}.mp4') and not os.path.isfile(f'{app_directory}/{tesla_cam}/{key}/{filename}.mp4_notified'):
                tag = key.replace('Clips', '')
                os.system(f'curl -F document=@"{app_directory}/{tesla_cam}/{key}/{filename}.mp4" "https://api.telegram.org/bot<TOKEN>/sendDocument?chat_id={telegram_channels[key]}&parse_mode=html&caption=<pre>{tag}: {filename}</pre>" && touch {app_directory}/{tesla_cam}/{key}/{filename}.mp4_notified')
sudo nano /lib/systemd/system/tesbla.service
/lib/systemd/system/tesbla.service
[Unit]
Description=tesbla

[Service]
ExecStart=sudo /usr/bin/python /usr/bin/tesbla.py

# Disable Python's buffering of STDOUT and STDERR, so that output from the
# service shows up immediately in systemd's logs
Environment=PYTHONUNBUFFERED=1

# Automatically restart the service if it crashes
Restart=on-failure

# Use a dedicated user to run our service
User=pi

[Install]
# Tell systemd to automatically start this service when the system boots (assuming the service is enabled)
WantedBy=default.target
- Enable the service.
sudo systemctl daemon-reload
sudo systemctl enable tesbla.service
sudo systemctl status tesbla.service
Step 4 - Disconnect & Reconnect Raspberry
- Please note that rebooting your Raspberry via command line won't always work as expected.
Useful Commands
- Copy all files via rsync:
rsync -avh pi@192.168.1.191:/tesbla .
Other Details & Links
- https://www.kernel.org/doc/Documentation/usb/gadget_configfs.txt
- https://www.isticktoit.net/?p=1383
- https://raspberrypi.stackexchange.com/questions/107010/change-raspberry-pi-zero-usb-gadget-name-from-linux-file-stor-gadget
- https://forums.raspberrypi.com/viewtopic.php?t=216810
- https://circuitdigest.com/microcontroller-projects/license-plate-recognition-using-raspberry-pi-and-opencv
- https://www.analyticsvidhya.com/blog/2021/12/vehicle-detection-and-counting-system-using-opencv/
- https://www.computerhope.com/unix/umount.htm